
For the USB Connection
Installing the Scanner Driver
You can install the scanner driver in the same way as when you install it for the USB connection.
For details, refer to "For the Network Connection".
Installing the Printer Driver
After installing, perform a test print in step 12.
-
Check that the machine and a computer are connected and the machine is turned on.
-
Insert the bundled "Software DVD-ROM" into a computer.
-
Double-click the [OKI] icon on the desktop.
-
Double-click [Drivers] > [PCL] > [Installer for OSX].
-
Enter the administrator password, and then click [OK].
Follow the on-screen instructions to complete the installation.
-
Select [System Preferences] from the Apple menu.
-
Click [Print & Scan].
-
Click [+].
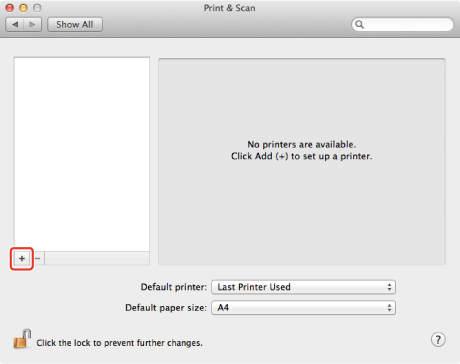
Note
If the machine is already displayed in [Printer], select the machine, and then click [-] to delete. Then, click [+].
-
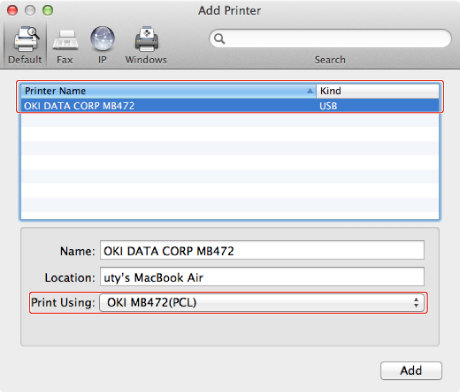
Select the machine with [Kind] being [USB], and then check that [OKI MB472(PCL)] is displayed for [Print Using].
-
Click [Add].
-
Check that the machine is added to [Printers] and [OKI MB472(PCL)] is displayed for [Kind].
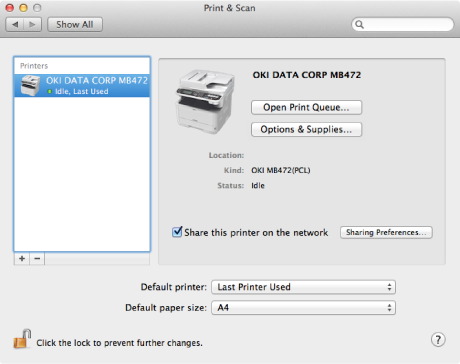
Note
If [OKI MB472(PCL)] is not displayed for [Kind] correctly, click [-], delete the machine from [Printers], and then repeat steps 8 to 10.
-
Click [Open Print Queue].
-
Select [Print Test Page] from the [Printer] menu.